Overview
3PLICITY integrates with Zapier to help automate workflows between your 3PL account and thousands of supported applications.
3PL Companies and Merchants can connect to Zapier either from the onboarding process or from the Settings menu.
After connecting your account, you can create automations (called Zaps) that react to Order events, such as new orders being created or existing orders being updated, or inventory adjustments.
Common examples include:
Sending email notifications
Posting messages to Slack
Creating spreadsheet records
Updating HubSpot contacts
Triggering workflows in other connected applications
Connecting Zapier During Onboarding
Zapier can be connected while completing the onboarding process.
During Step 5 – Integrations, click Connect in the Zapier section.
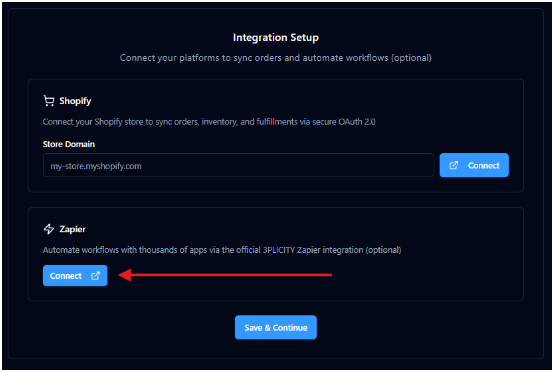
Before continuing, make sure you already have a Zapier account. If you do not have one, you can create one by selecting Sign Up and completing the registration process before connecting with 3PLicity.
After clicking Connect:
You are redirected to Zapier.
Accept the invitation to connect your organization.
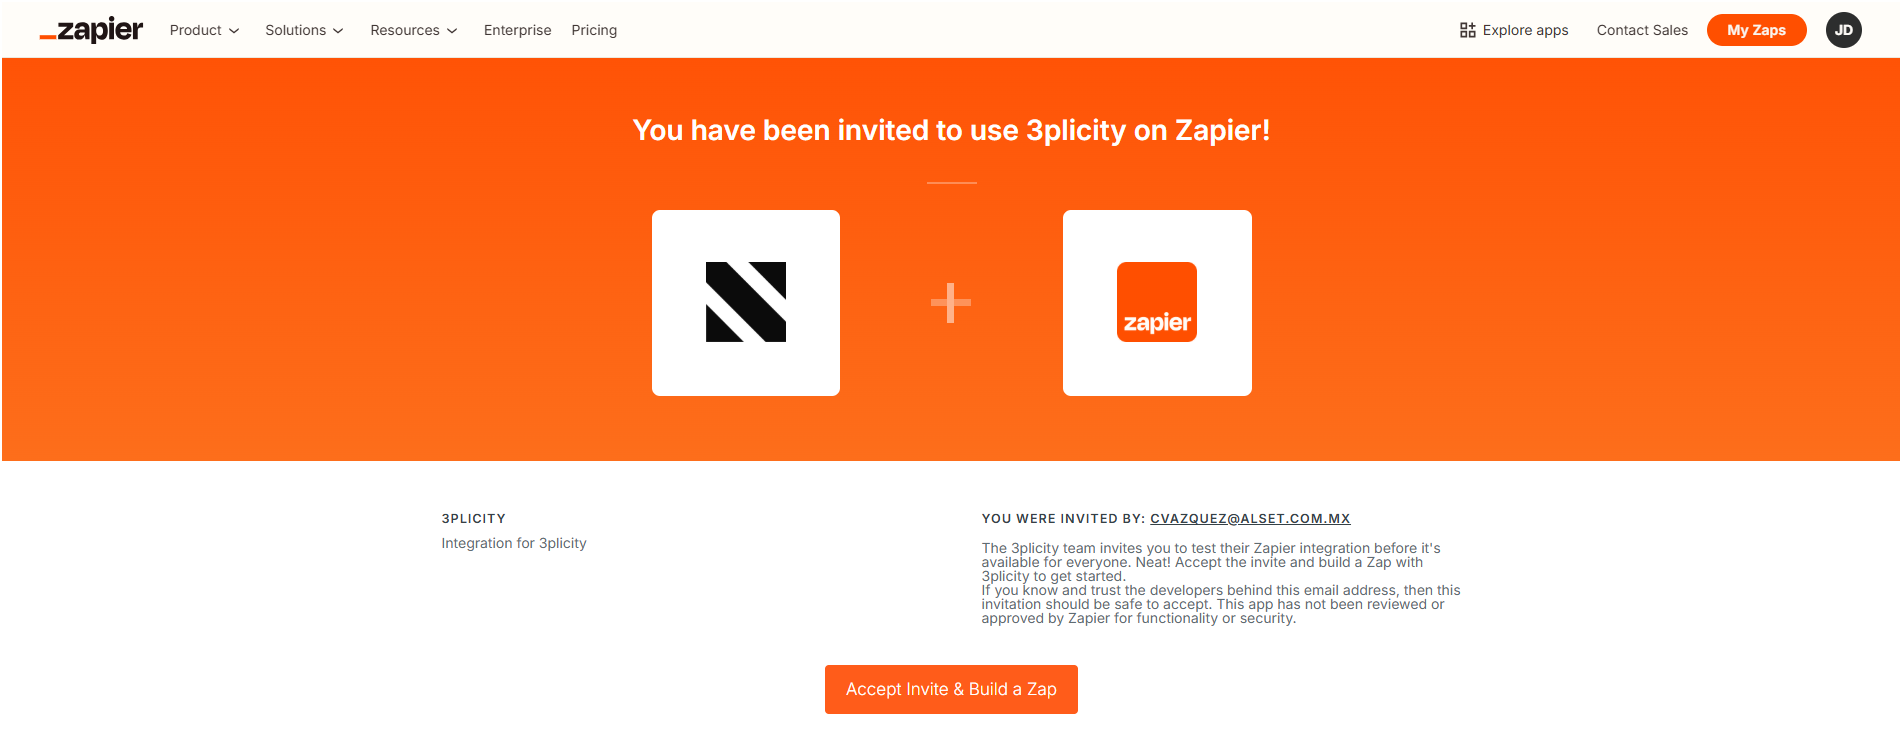
Once accepted, continue with the connection process described below.
The connection status may remain as "not connected" until you complete the Zapier connection process.
After that connection process is completed successfully, the integration will then appear as Connected in your onboarding screen.
Connecting Zapier from Settings
If you skipped this step during onboarding, you can connect Zapier at any time.
Sign in to your 3PLICITY Company or 3PL Merchant account.
Navigate to Settings.
Open the Zapier section.
Click Connect.

You are redirected to Zapier, where an invitation to join the integration is displayed.
If you do not already have a Zapier account, create one before continuing.
Click Accept Invitation.
After accepting, Zapier opens its own dashboard.
Proceed with the instructions below.
Creating the 3PLICITY App Connection
Before creating automations, connect your 3PLICITY account to Zapier.
From your Zapier dashboard:
Open App Connections.
Click Create Connection.
Search for 3PLICITY.
Select the application.
A login window appears.
Sign in using the same username and password you use for your 3PLICITY Company or Merchant account.
Click Connect.
Grant permissions if requested.
After authentication, the connection is created successfully.
Back in 3PLICITY, the Zapier integration now displays the status Connected.
Note: The connection may initially appear with the name ApiKey. You may rename the connection inside Zapier at any time for easier identification.

Creating a Zap
Once your account has been connected, you can begin creating automated workflows.
From the Zapier dashboard:
Click Create Zap.
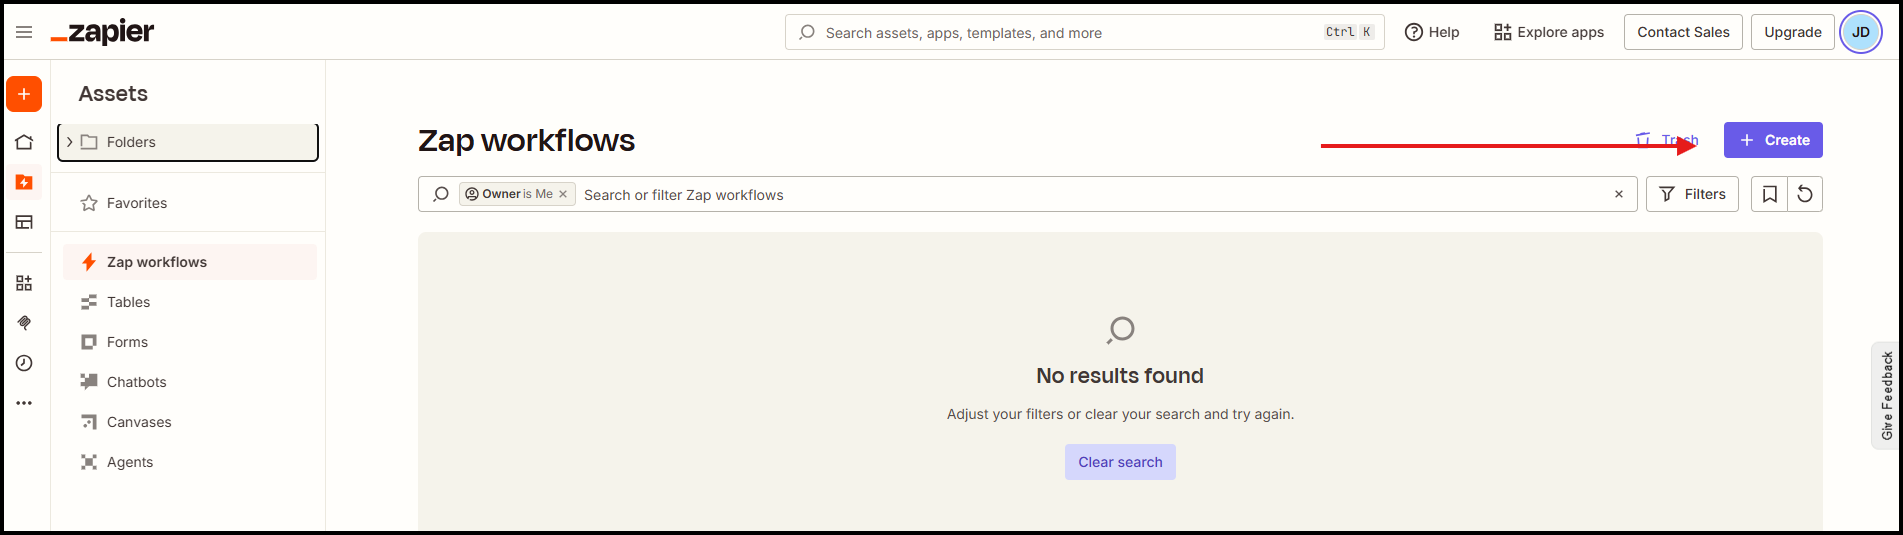
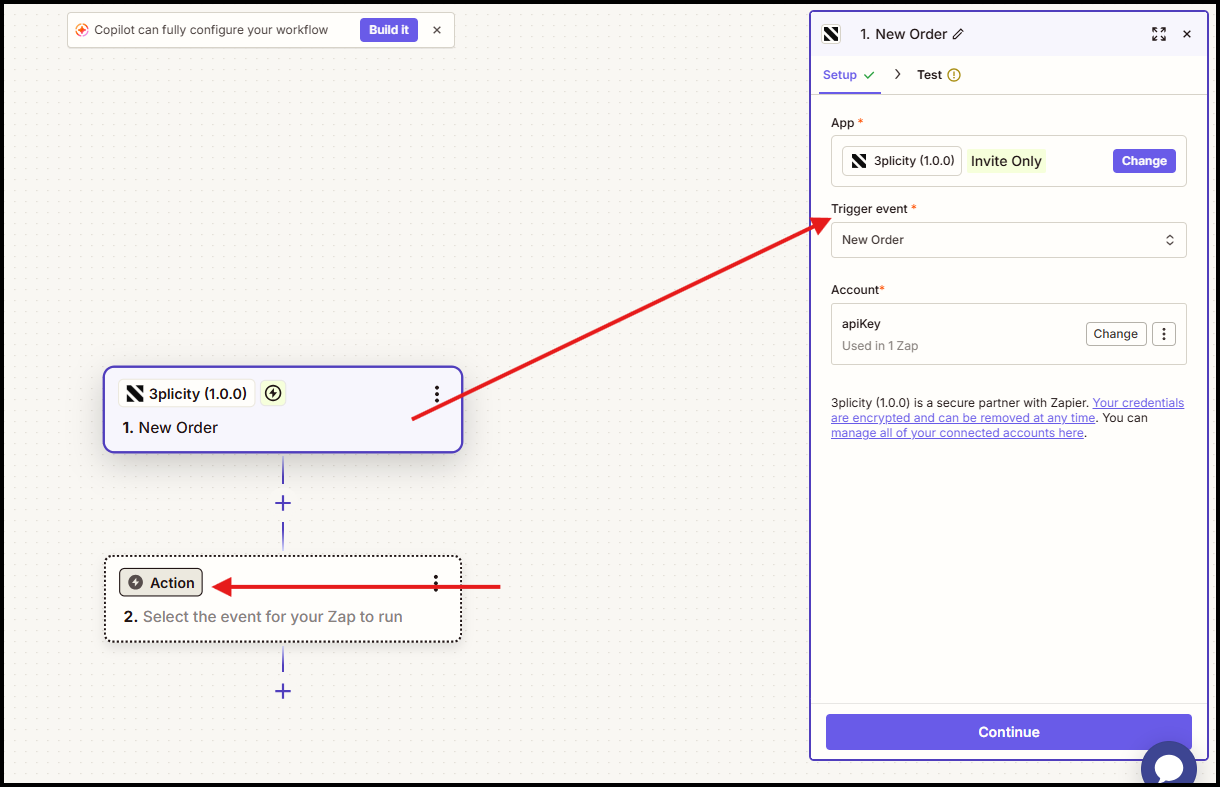
Every Zap consists of two parts:
Trigger – The event that starts the automation.
Action – What Zapier does after the trigger occurs.
Managing Your Connection
Once connected, the Zapier integration remains available from the Settings > Zapier section in 3PLICITY.
From there, you can verify that your account is connected and continue managing your automations directly from Zapier.
Was this article helpful?
That’s Great!
Thank you for your feedback
Sorry! We couldn't be helpful
Thank you for your feedback
Feedback sent
We appreciate your effort and will try to fix the article