From the Zapier dashboard:
Click Create Zap.
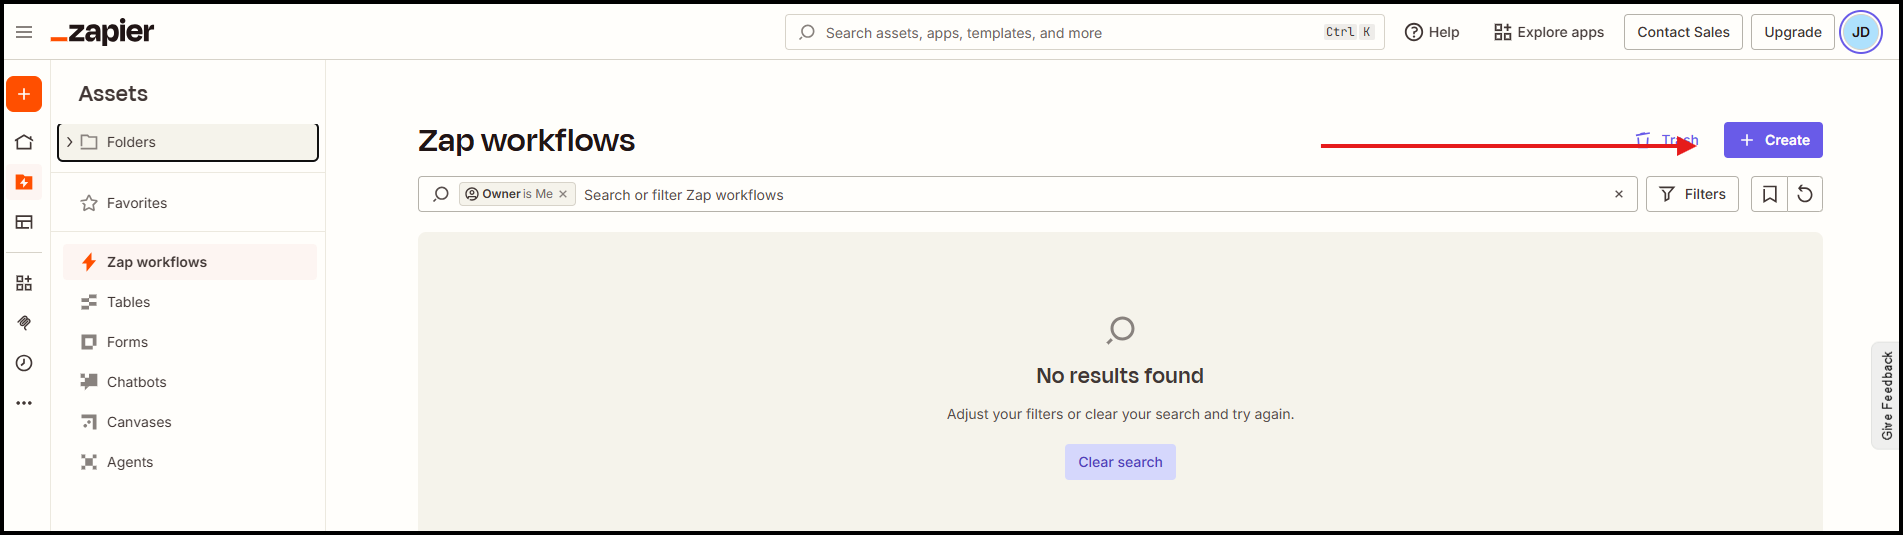
- The Zap creation dashboard will display with floating modules for a trigger and an action.
- Every Zap consists of two parts:
Trigger – The event that starts the automation.
Action – What Zapier does after the trigger occurs.
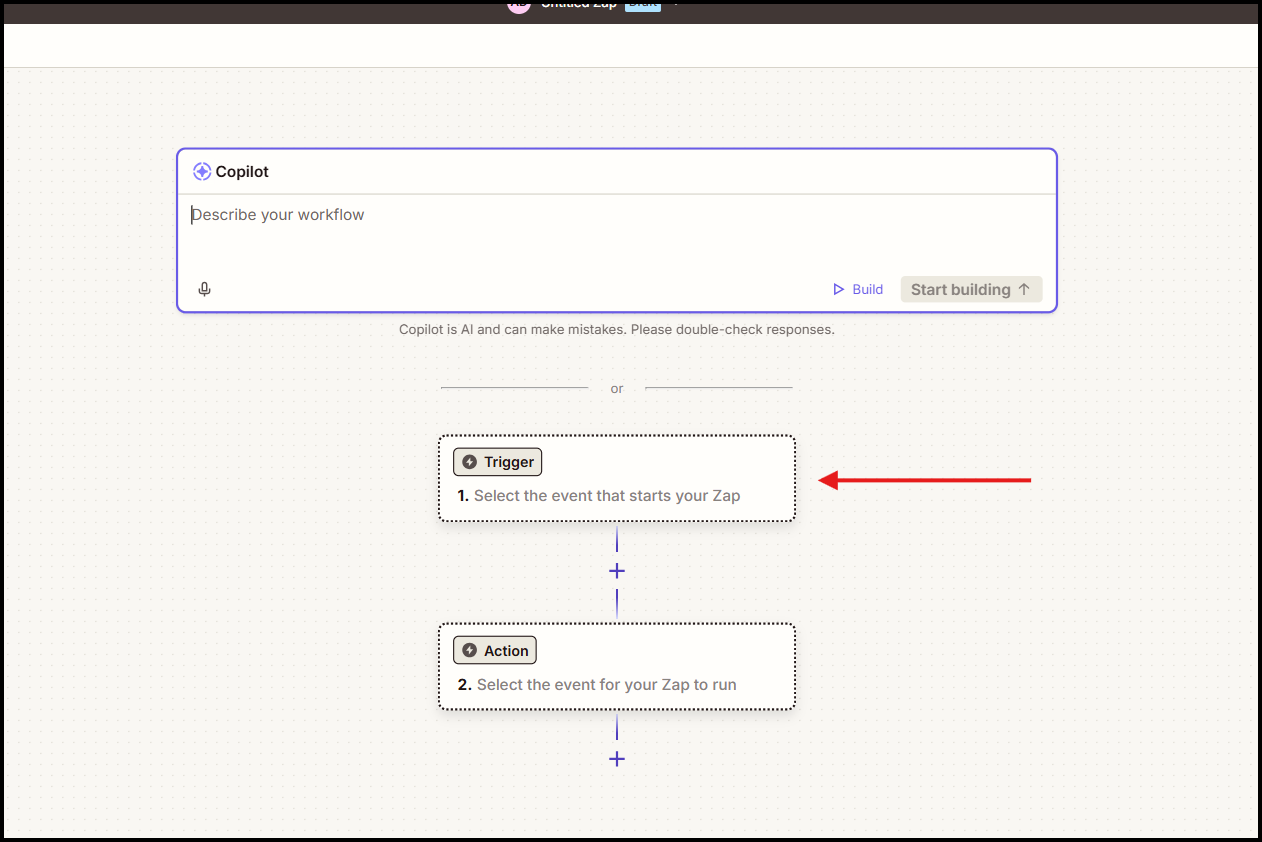
- Click on the Trigger box.
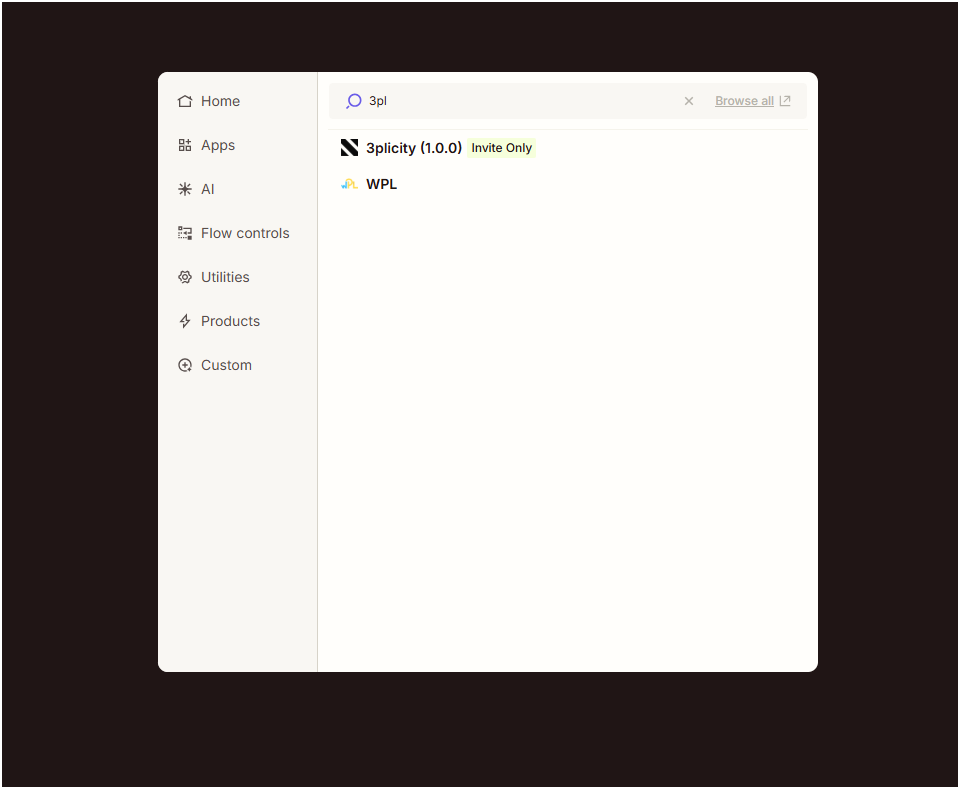
- A modal with a list of apps will be displayed, type in "3pl" to find the 3PLICITY app:
- A modal on the right will appear with blank dropdowns:
Creating a "New Order" Automation
Select 3PLICITY as the Trigger app on the previous app selector modal.
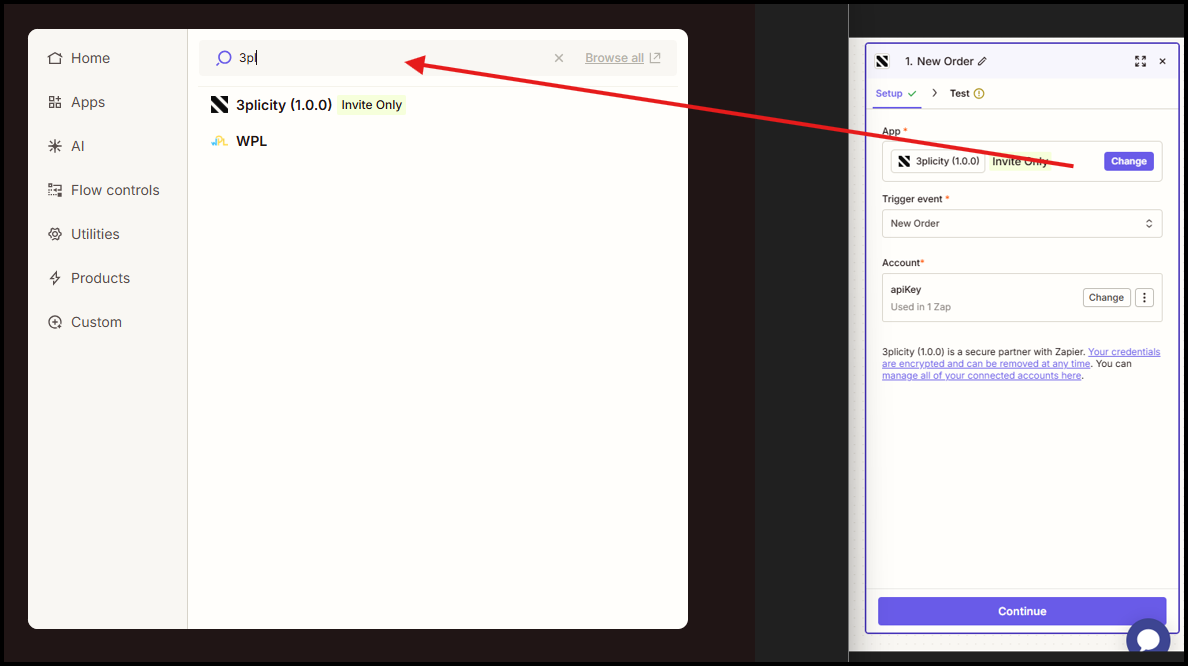
Under Trigger Event, choose New Order.
On the Account dropdown click Select.
A list of available connected accounts is displayed:
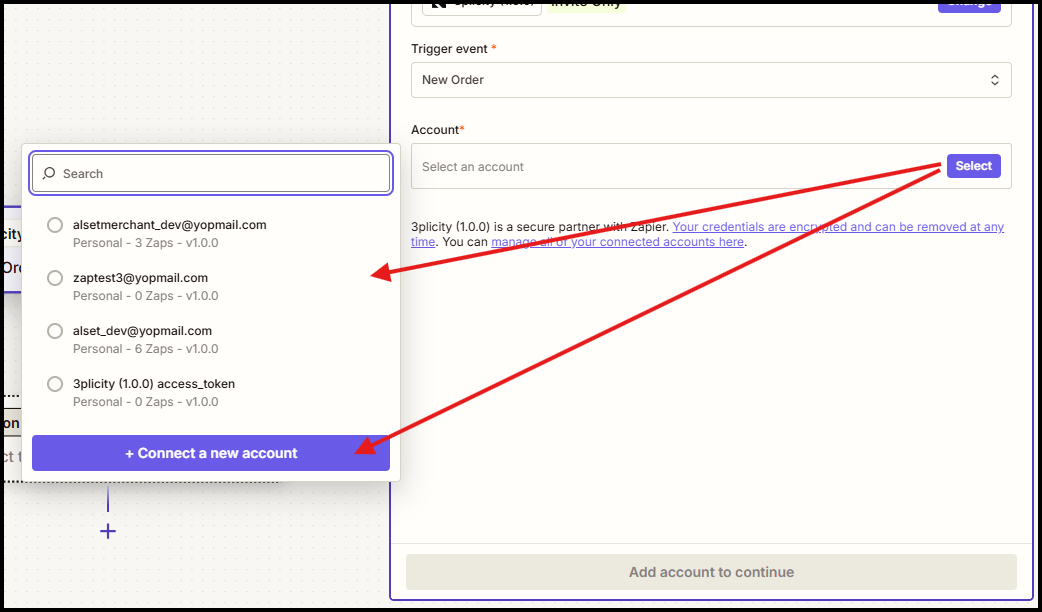
5. Choose the account you wish to link the zap to.
* If you previously created the App Connection, your account may already be available for selection.
If prompted to connect an account:
Click Connect a New Account and follow visual instructions.
Log in using your 3PLICITY credentials.
Click Connect.
Once you have selected your desired account, click Continue.
Testing the Trigger
1. Before testing the trigger, make sure you have at least one recent Sales Order available. If necessary, create a new Sales Order before running the test.
2. Only Sales Orders are supported by this trigger.
3. Return to Zapier.
4. Click Test Trigger.
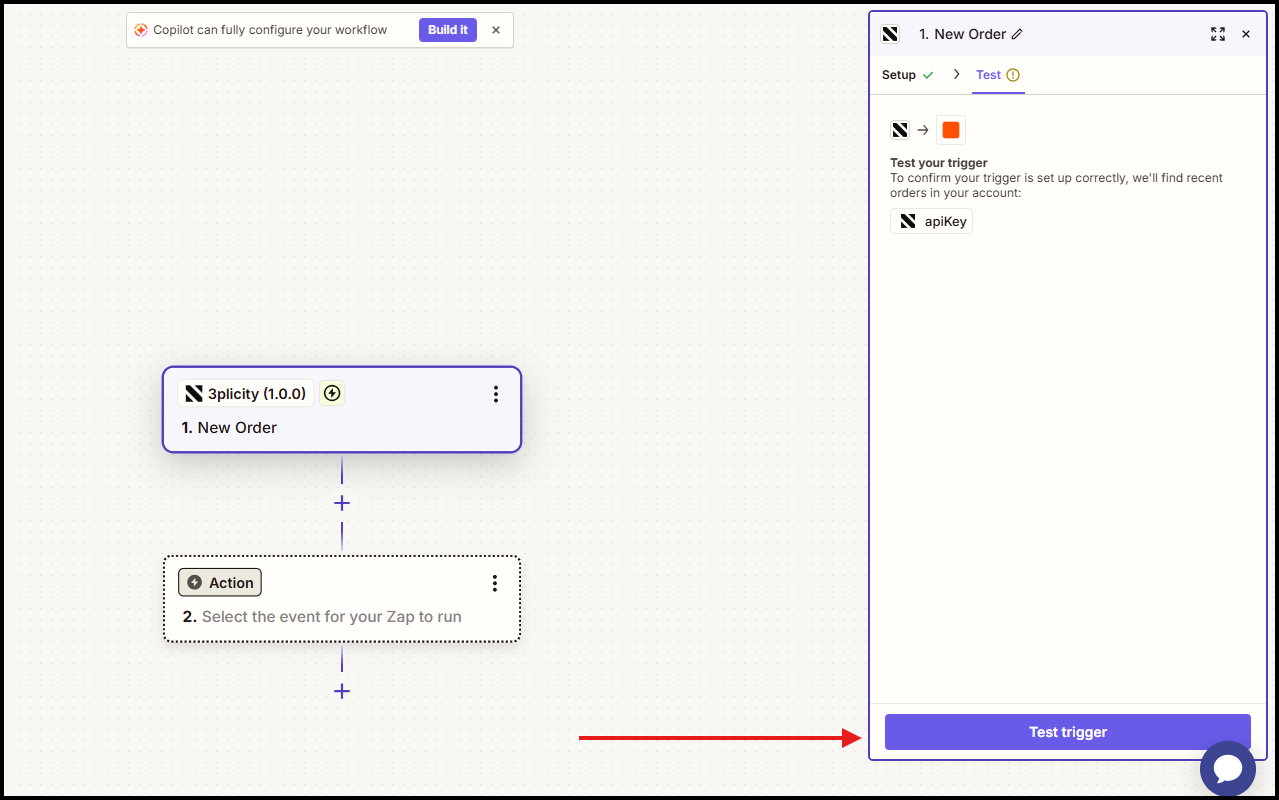
Zapier retrieves the newly created Sales Order.
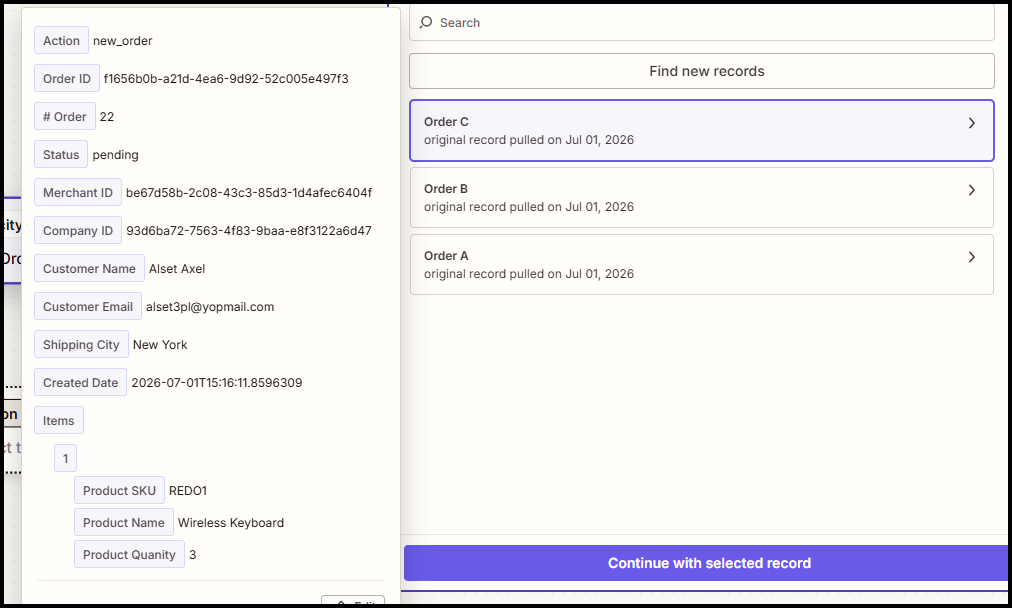
Select the desired record and click Continue with Selected Record.
Configuring the Action
Next, choose the application that should receive the information as you did with the 3Plicity app.
Examples include:
Gmail
Slack
Microsoft Excel
HubSpot
Google Sheets
Thousands of other supported applications
For this example:
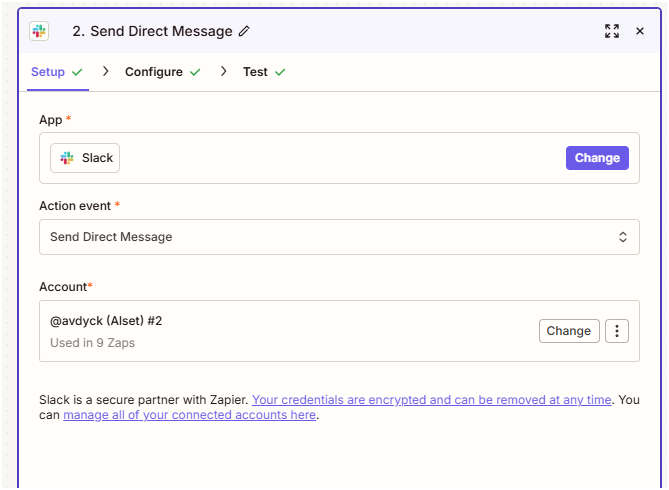
Select Slack.
Choose the Send Direct Message action.
Connect your Slack account if necessary.
Click Continue.
Mapping Sales Order Information
Zapier allows you to insert Sales Order information into your action.
Navigate through the customizable options for Slack and for the message formatting, you can review:
Configurable Fields: For each configurable field, click the + icon to insert dynamic values.
Examples include:
Order ID
Order Number
Customer Name
Status
Shipping Address
Tracking Number
Merchant Name
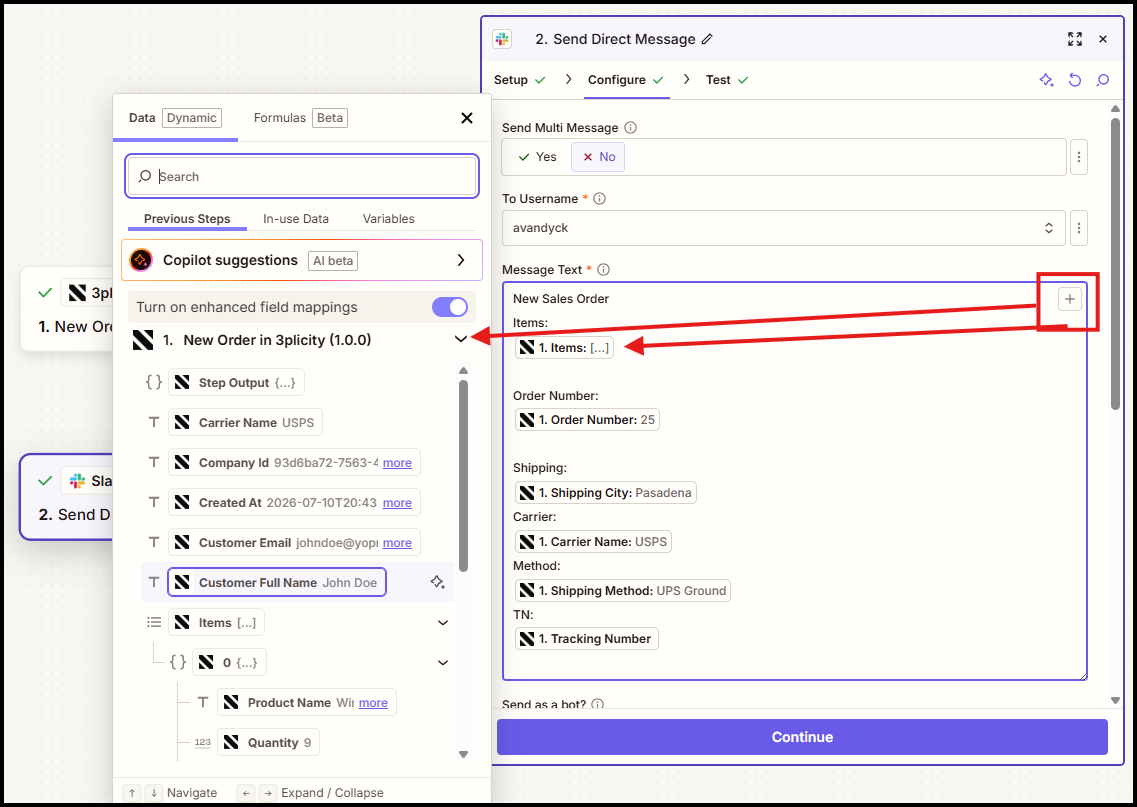
You can combine dynamic fields with your own custom text to build personalized notifications.
After configuring the desired fields, click Continue.
Testing the Action
Review the action configuration.
Click Test Step.
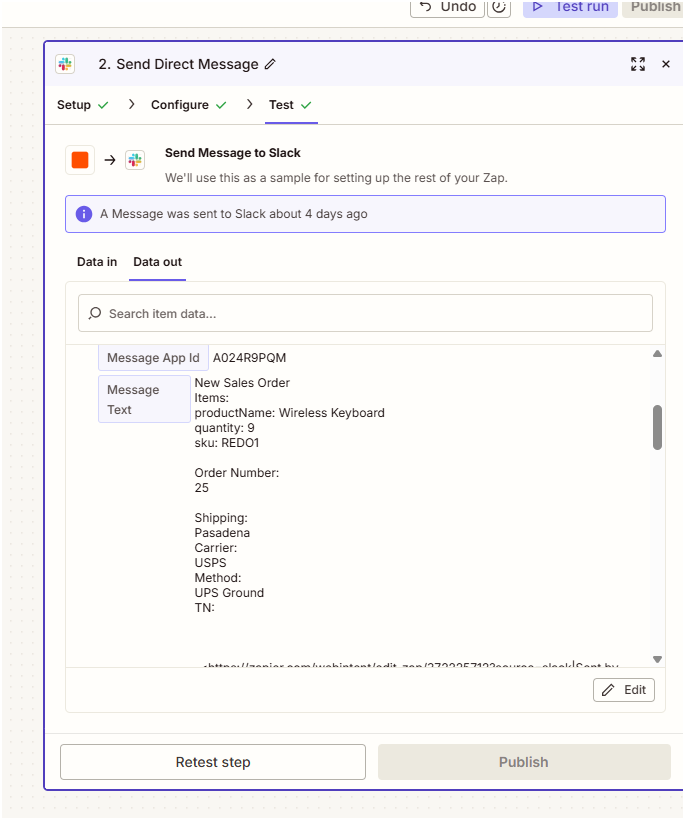
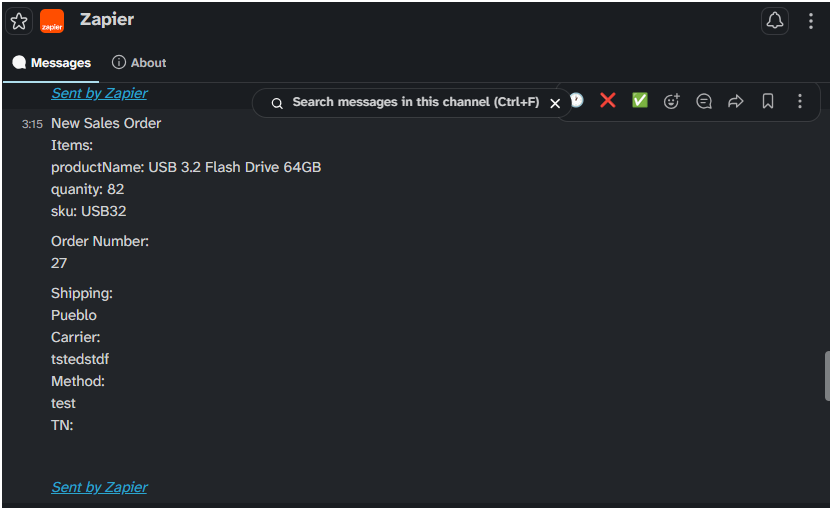
Zapier sends a test message using the configured information.
Verify that the notification has been received successfully.
If everything looks correct, click Publish.
Your automation is now active.
Every new Sales Order created in 3PLICITY will automatically trigger the configured workflow.
Managing Your Connection
Once connected, the Zapier integration remains available from the Settings > Zapier section in 3PLICITY.
From there, you can verify that your account is connected and continue managing your automations directly from Zapier.
Was this article helpful?
That’s Great!
Thank you for your feedback
Sorry! We couldn't be helpful
Thank you for your feedback
Feedback sent
We appreciate your effort and will try to fix the article