Creating a "New Purchase Order" Automation
The New Purchase Order trigger allows you to start an automation whenever a new Purchase Order is created in 3PLICITY.
This trigger is useful for notifying warehouse teams, updating external systems, or starting automated purchasing workflows.
Examples include:
- Sending email notifications
- Posting Slack messages
- Creating spreadsheet entries
- Updating ERP or purchasing systems
- Triggering approval workflows in other applications
Selecting the Trigger
From the Zapier dashboard:
- Click Create Zap.
- Click the Trigger box.
- Search for 3PLICITY.
- Select 3PLICITY as the Trigger application.
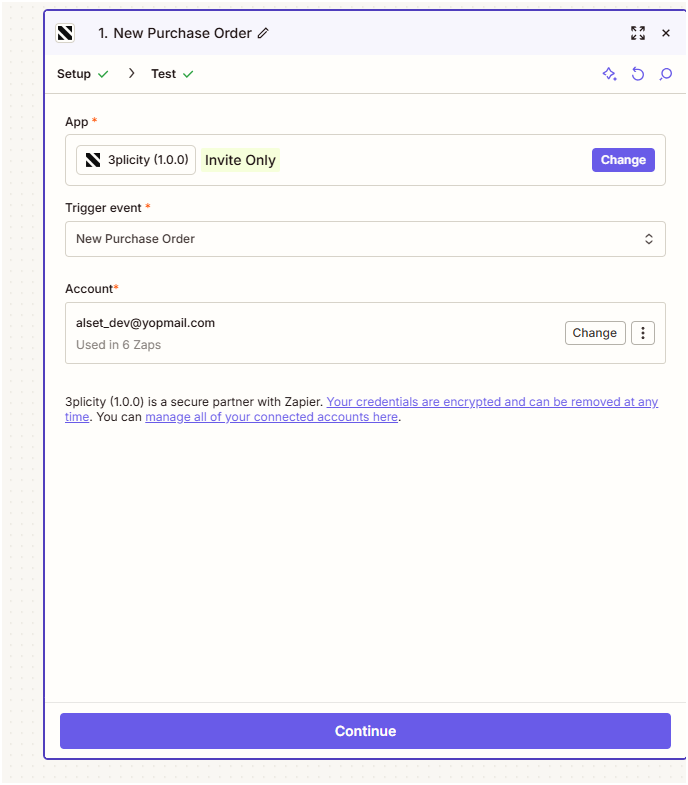
Under Trigger Event, select:
New Purchase Order
Selecting Your 3PLICITY Account
Open the Account dropdown.
Select the connected 3PLICITY account you want to use.
If your account is not yet connected:
- Click Connect a New Account.
- Sign in using your 3PLICITY credentials.
- Click Connect.
- Return to the Zap and click Continue.
Testing the Trigger
Before testing the trigger, make sure you have at least one recent Purchase Order available. If necessary, create a new Purchase Order before running the test.
After the Purchase Order has been created:
- Return to Zapier.
- Click Test Trigger.
Zapier retrieves the most recently created Purchase Orders from your 3PLICITY account.
Select the desired record.
If the newly created Purchase Order is not displayed, click Find New Records to refresh the available records.
Once the correct Purchase Order appears, click Continue with Selected Record.
Configuring the Action
Choose the application that should receive the Purchase Order information.
Examples include:
- Gmail
- Slack
- Microsoft Excel
- Google Sheets
- HubSpot
- Thousands of other supported applications
For this example:
- Select Slack.
- Choose Send Direct Message.
- Connect your Slack account if necessary.
- Click Continue.
Mapping Purchase Order Information
Use the + button next to each configurable field to insert information from the Purchase Order.
Available fields may include:
- Purchase Order ID
- Purchase Order Number
- Merchant Name
- Supplier Name
- Status
- Warehouse
- Created Date
- Total Quantity
- Total Amount
- Product Information
You can combine these dynamic values with your own custom text to create personalized notifications.
After configuring the desired fields, click Continue.
Testing the Action
Review the action configuration.
Click Test Step.
Zapier sends a test notification using the selected Purchase Order information.
Verify that the notification is received correctly in the selected application.
If everything looks correct, click Publish.
Your automation is now active.
Every time a new Purchase Order is created in 3PLICITY, Zapier will automatically trigger the configured workflow.
Managing Your Connection
Once connected, your Zapier integration remains available from Settings → Zapier in 3PLICITY.
From there, you can verify that your account is connected and continue managing your automations directly from Zapier.
Was this article helpful?
That’s Great!
Thank you for your feedback
Sorry! We couldn't be helpful
Thank you for your feedback
Feedback sent
We appreciate your effort and will try to fix the article